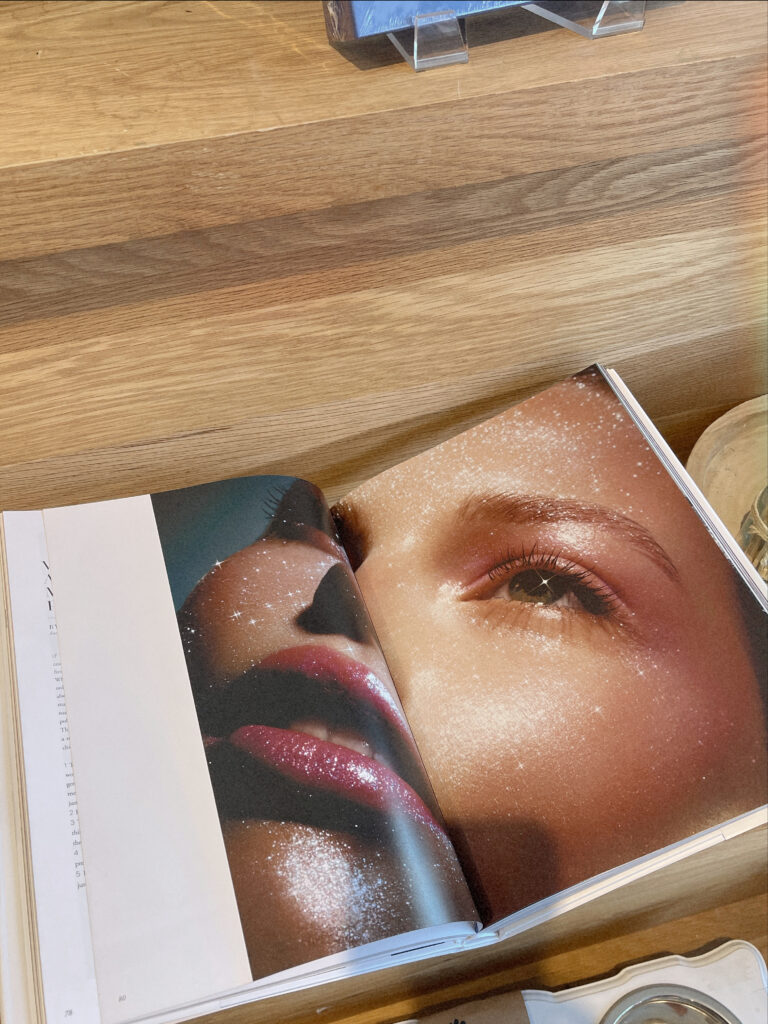
The one thing that consistently brings me back to life, fills me with joy, and makes me feel endlessly fabulous and creative (especially when I’m feeling low) is the artistic, glamorous, shimmering world of beauty.
And when you think of beauty, what’s the first word that comes to mind? Mine is Sephora.
Sephora is like a beauty Mecca, it’s our holy place that makes any girl or boy feel fabulous.
As soon as I step inside, my troubles seem to slip away. It’s my happy place. Just cruising through the aisles, admiring all the beautiful tones and hues, the sparkles, and luscious scents. It makes you feel like you can reinvent yourself, to become whoever you want to be.
Your own dream girl, or boy.
Now, even though Sephora is beautifully organized, if you’re new to the world of beauty then it can be a little overwhelming with the amount of choices you have…especially since most products serve the same purpose, have the same tone, etc.
And if you’ve ventured into building a makeup collection, you’ll know it can get pretty pricey pretty fast…
So, if you’re a beauty beginner, I wanted to specifically create and break down a list of my favorite products that I think any beauty beginner can use and will love so that you can skip the stress of using your entire paycheck to buy and test products and narrow it down based off of this list.
I’ve spent years comparing and contrasting my favorite products and narrowing them down to create my ideal capsule makeup collection.
I find my favorites and stick to them, then once in a while add something brand new after doing lots of research ahead of time to determine if it’s something that I’ll use every day, and worth buying.
Because at the end of the day, makeup is an investment. At least I believe it to be.
I care about what goes on my skin since it’ll absorb the ingredients, so I want to make sure that the products I use are not only beautiful but beneficial.
When I was a beauty beginner and learning about makeup for the first time, something I could never find was a clear, detailed list of beginner-friendly products (makeup or skincare) that outlined an easy-to-understand guide on what to use, why it’s great, and how it works.
When you know absolutely nothing about how to use makeup, where to start, or how to even apply it, getting started with building a makeup collection gets pretty tough, and a bit expensive.
After all, especially for anyone on a budget (so most of us), we want to look our best but can’t always afford the best.
Luckily, you don’t have to spend thousands, or even hundreds, of dollars to look or feel like you want to.
Although I do believe for certain products in particular (skincare, foundation, etc.) it’s better to spend more money than suffer long-term from poor-quality ingredients.
If you have sensitive skin or react easily to beauty products, I recommend consulting with your doctor or dermatologist to understand what’s best for your skin.
As a beauty beginner, here are 4 things to keep in mind…
1. The Type of Look You Want To Achieve.
- Glowy, natural, matte, full-coverage, etc.
2. Understanding Your Skin Type and Needs.
- Normal, dry, oily, combo, acne-prone, etc.
3. Learning How Products Work/Blend Together.
- Foundation with concealer, bronzer with blush, etc.
4. The Products You Want vs Need.
- We all have a wishlist of the products that catch our eye, but which products do you need for a complete look first? Then add the special occasion products later.
By The Way…
Now, I’m no beauty expert by any means, but I do know which products I love, which work best with my skin type and tone, and what I’m obsessed with.
Quick Disclaimer: Every single person has a different skin type, needs, and wants, plus makeup formulas and ingredients react to each of us differently. What works for me won’t necessarily work for you. If you’ve got acne-prone skin or deal with issues that affect your skin (the products that work for me don’t necessarily work for my friend with PCOS, for example) then definitely consider that with these recommendations and do some research before you buy anything.
If You’re Wondering About Me…
My Skin Type: Combo; oily t-zones but dry around my mouth and under my eyes.
My Preferred Makeup Look: I love a glowy base, typically with a neutral eyeshadow look with pops of color and some shimmer.
Age Group: 20s
My Skin Concerns: I have Excema flair-ups, specifically around my mouth and under my eyes.
Okay, it’s time to break down a Simple, Beginner’s Guide To Building Your Own Makeup Collection.
The Foundation of A Radiant Base
It Always Starts With Good Skincare
The best makeup tip I’ve ever heard, and hear over and over, is that prepping the skin with proper, hydrating skincare will ensure a radiant base for makeup application.
You wouldn’t apply wall paint before primer. The same goes for our face.
Just remember, skincare is the most important step in a makeup routine.
I’ve never had an extensive skincare routine, mostly because I never felt the need to do so.
And what’s always worked for me is taking the time to understand my skin concerns, figuring out what kind of products I’m looking for, and the effect I want on my skin.
Then I read, listen, and watch many reviews on those products from people with a similar skin type before I buy them for myself to avoid overspending.
My Skincare Steps, Before Makeup
Step 1: Toner
What is toner and why do I need it?
“A toner is a fast-penetrating liquid that delivers skin a quick hit of hydration and helps remove some dead cells off the surface of the skin,” according to Arielle Kauvar a New York-based dermatologist.
…the co-founder of Glow Recipe tells Allure. “The idea is to thoroughly cleanse and clarify via your double cleanse, then use a toner as the first leave-on step that hydrates and treats.”
So in the morning after I get out of the shower, I start by applying the Glow Recipe Watermelon Glow PHA + BHA Pore-Tight Toner to my bare face.
Step 2: Moisturizer
I let the toner sink into my skin for a couple of minutes, then I apply a hydrating moisturizer to ensure my skin is properly prepped for makeup application and avoid dry patches on the skin.
My go-to is First Aid Beauty’s Ultra Repair Cream Intense Hydration.
Step 3: Don’t forget the lips!
If you want to splurge (a very worthy splurge) on a lip moisturizer, I always recommend the Laneige Lip Sleeping Mask Intense Hydration with Vitamin C (my fav is vanilla) or the Lip Glowy Balm (grapefruit is my go-to), also from Laneige.
They’re basically the same thing, one comes in a pot, and the other is in a tube applicator.
Quick Tip: I’ve dealt with Eczema for my whole life (and still do occasionally) and what I love about First Aid Beauty is their focus on using ingredients to help relieve the discomfort of Eczema. Specifically, oatmeal. I’ve always found that their products don’t irritate my skin, specifically because they avoid artificial fragrances and use non-toxic ingredients.
Also, the Lip Sleeping Mask from Laneige was my saving grace when my Eczema was at an all-time high. Highly recommend.
By The Way, What’s Eczema?
“Eczema is generally defined as inflammation of the skin and affects about 3% of the adults in the United States and about 13% of children”, according to the FDA.
To wrap up the skincare portion of this guide, to keep it simple, stick with products that are hydrating and moisturizing, rather than mattifying. Although, overall, choosing the right base products will depend on your skin type (whether you’ve got dry, oily, or combo skin).
So, if you are on the oily or combo side, after you apply hydration you can go in with a mattifying primer to balance out excess oil, reduce shine, and create a smooth base.
If this sounds like you, then my favorite primer to recommend (and one I use every day) is from Milk Makeup, the Hydro Grip Hydrating Makeup Primer with Hyaluronic Acid + Niacinamide.
Step 4: Sunscreen (Always!)
Do yourself a favor and start incorporating sunscreen into your daily routine, ASAP.
No matter what age you’re at, it’s always important to use sunscreen, regardless of the season.
Not all sunscreens are the same, so I highly recommend doing some research to see which one you personally prefer, but my two favorites are the Supergoop! Glowscreen SPF 40 Sunscreen with Hyaluronic Acid + Niacinamide and Paula’s Choice CLEAR Ultra-Light Daily Hydrating Face Sunscreen SPF 30+.
If you’re going to remember anything, remember this: prepping the skin with hydration and moisture is going to give you the best base for your makeup. It’s essential.

Time For Makeup
Step 1: Glow
If you want a glowy, radiant base, add a face glow to your moisturizer. It gives a sweet touch of glow without being too shiny (unless you’re on the oily side, I recommend opting for a mattifying primer).
My two favorites that are super simple to use are the Kosas Glow I.V. Vitamin-Infused Skin Illuminating Enhancer and the Saie Glowy Super Gel Lightweight Dewy Multipurpose Illuminator.
To be honest, these are everyone’s favorites, they’re that good and easy to apply.
Quick Tip: You could also just sunscreen.
Step 2: Primer
If you’ve already applied proper skincare, then a primer isn’t always necessary.
I like to apply a primer if I know I need or want my makeup to last all day or night. So, my go-to and the only primer I use is the Hydro Grip Hydrating Makeup Primer with Hyaluronic Acid + Niacinamide from Milk Makeup.
It has a tacky texture (best for long-lasting makeup) and I apply it to my t-zones.
Step 3: Foundation
Out of all of these steps, foundation is probably the one with the most options simply because this is such a personal choice.
You may not want foundation and prefer a tinted moisturizer, or nothing at all, and just want concealer.
This all depends on you and there’s no wrong choice. Just depends on your preference.
For me, if I were to choose to wear foundation rather than just a glowy primer and concealer, then I would choose the Makeup By Mario SurrealSkin Liquid Foundation or Charlotte Tilbury’s Beautiful Skin Medium Coverage Liquid Foundation with Hyaluronic Acid because they’re both beautifully glowy, hydrating and feels barely there on the skin while giving great medium coverage.
What’s the best way to apply foundation?
There are a few ways: with your hands, a brush, or a beauty sponge.
For me, I choose to use a brush to apply the foundation, and then a sponge to blend it into my skin and smooth it out.
There are a ton of brushes out there, but as a beginner, I’d recommend Rare Beauty’s Liquid Touch Foundation Brush. It’s lovely and not too expensive compared to others. You can get a beauty sponge from anywhere, but here is Beautyblender’s Original BeautyBelnder Makeup Sponge.
Step 4: Concealer
What is the point of concealer?
Usually, people wear concealer to conceal the dark circles under their eyes, brighten the under-eye area, and/or cover up blemishes.
It’s probably the trickiest makeup product beauty beginners struggle with.
Finding your ideal formula takes time and one concealer doesn’t suit all, but I have found one that everyone is consistently obsessed with. The Kosas Revealer Super Creamy + Brightening Concealer with Caffeine and Hyaluronic Acid is truly ultra-creamy, easy to apply and blend, and has good coverage.
It’s the only one I recommend because it really is the only one you need when starting your collection.
Quick Tip: If you’re really not interested in concealer, but would like a light layer to brighten your under-eye area, then I recommend my secret weapon, the Magic Vanish Color Corrector from Charlotte Tilbury.
Step 5: Bronzer
If anything, out of all the types of products listed, bronzer isn’t necessary, but it definitely elevates a look.
Bronzer brings the warmth back into your skin after you’ve applied foundation. I like to apply a light layer of bronzer to the areas of my face that would naturally get sun – a little on my forehead around my hairline, on my cheekbones, and a bit on my nose to keep the look natural.
My personal favorites include Rare Beauty’s Warm Wishes Effortless Bronzer Stick, Fenty Beauty’s Sun Stalk’r Instant Warmth Bronzer, and the NARS Laguna Talc-Free Bronzer Powder.
A little goes a long way.
Step 6: Blush
Oh, how I love blush!
Blush is so fun and there are so many different kinds that you really can’t go wrong with any of them. It all depends on what catches your eye and what color and undertone goes well with your skin tone.
I’ll always and forever recommend Charlotte Tilbury’s Beauty Highlighter Wand (the shade Pinkgasm Sunset), Patrick Ta’s Monochrome Moment Velvet Blush, and NARS Blush in Dolce Vita.
Step 7: Eyeshadow
Choosing an eyeshadow palette can sometimes feel overwhelming. There are so many options and they all look exactly the same. But, when comparing, I’ve found that some palettes are great for anyone to use at any skill level, and others that are meant for more detailed eye looks.
Makeup By Mario’s Ethereal Eyes Eyeshadow Palette is the perfect everyday palette for anyone. The shadows are so creamy and easy to work with (blends like a dream with no effort) and you’ve got 12 beautiful shades for day and night.
If you don’t want an entire eyeshadow palette, you can also just use your bronzer and then add a shimmer on top. My ultimate favorite topper is Makeup By Mario’s Master Crystal Reflector, specifically in the shade Bronzite – shimmering cocoa brown.
The last palette I have to mention is Tarte’s Tartelette In Bloom Clay Eyeshadow Palette. This was the very first eyeshadow palette I ever bought, and it will forever be one of the most underrated palettes out there, and one of my favorites.
Step 8: Eyeliner
I don’t know about you but my favorite way to change my makeup look is by adding eyeliner. The one question I’ve gotten most from my friends who are exploring makeup is, “How do I use eyeliner?” That’s honestly a great question because it’s tricky, but once you get the hang of it it’s a simple trick.
My go-to is using a brown eyeshadow from my palette and applying it to my lash line with an angled brush. Gives a very natural look and makes the eyes pop.
If you’re in the mood for a liquid liner, Rare Beauty’s Perfect Strokes Matte Liquid Liner is a hit and easy to use. Then if you’re in the mood for an eyeliner pencil, Makeup By Mario’s Master Pigment Pro Eyeliner Pencil. It’s very creamy and glides onto the eyes effortlessly.
Step 9: Mascara
Mascara is also a personal choice, everyone looks for something different. You may want long lashes, thick lashes, or maybe just ultra-natural.
LANCÔME’s Monsieur Big Mascara Duo Set and Hypnose Drama Instant Full Body Volume Mascara will always be two mascaras that I’ll always recommend, or HYPNÔSE DRAMA Instant Full Body Volume Mascara. The length and extension effect it has on your eyelashes is amazing.
If you’re into a natural look (barely there) then you might want to try Glossier’s Lash Slick Lift and Lengthening Mascara.
Step 10: Highlighter
Highlighter has got to be the most delicious makeup product to play with. You may want something more natural, or maybe you’d like something sparkling.
My three favorite options are Rare Beauty’s Positive Light Liquid Luminzer Highlight, Charlotte Tilbury’s Beauty Highlighter Wand, and Fenty Beauty’s Diamond Bomb All-Over Diamond Veil.
Honestly, pick the one that excites you the most.
Step 11: Setting Powder
A necessity for people with oily/combo skin, setting powder is essentially a powder that takes away shine or excess oil from your skin. This can get tricky for those with dry skin, so I recommend using it lightly and only where you have excess oil.
I never used to wear setting powder, but the Ultimate Blurring Setting Powder from ONE/SIZE is a game-changer. Especially in Ultra-Pink. Yes, pink.
Step 12: Lip
When it comes to lip products, you really can’t go wrong.
There are lip oils, lipsticks, lip stains, lip glosses, and everything in between. Finding your favorites will come down to the type of finish you want.
For me, I love to recommend a little bit of everything since there are just so many different options, and they all are great for different occasions.
Rare Beauty’s Soft Pinch Tinted Lip Oil in the shade Wonder is an easy product to recommend. It lasts long, looks beautiful, and is very hydrating. Fenty Beauty’s Slip Shine Sheer Shiny Lipstick is so underrated. The shades are so unique, glide onto the lips, and are great to keep in your purse. Charlotte Tilbury is known for her many products, but one of her superstar products that always lives up to the hype is her lipstick.
The Mini Pillow Talk Lipstick & Liner Set is the ideal set for anyone dipping their toes in lipstick and lipliner since they’re both mini (surprisingly last a long time), so you have the chance to try a legendary product, that will no doubt look good on you, without having to splurge the usual $34 for lipstick.
Back to Fenty Beauty, the Gloss Bomb Universal Lip Luminizer was a hit the minute they launched, and for good reason. It makes your lips shine, sparkle, and look incredible in every shade. If you ever want just one lip gloss, this is it.
Next, for the girls and boys who want something more shiny than sticky, try Gisou’s Honey Infused Hydrating Lip Oil. It’s beautiful and feels effortless to wear.
Last but not least, something for those who just want something hydrating with no sparkle, try the Laneige Lip Glowy Balm. It’s just a glowy balm but looks and feels so good.
Step 13: Setting Spray
After you’ve set your face, it’s great to add some setting spray at the end to help the makeup last longer throughout the day.
My go-to to add an extra layer of hydration and glow is Rare Beauty’s Always An Optimist 4-in-1 Prime & Set Mist.
Need A List? Here It Is.
Skincare
- Toner: Glow Recipe “Watermelon Glow PHA + BHA Pore-Tight Toner”
- Face Cream: First Aid Beauty “Ultra Repair Cream Intense Hydration”
- Lip Balm: Lip Sleeping Mask Intense Hydration with Vitamin C
Sunscreen
- Supergoop! “Glowscreen SPF 40 Sunscreen with Hyaluronic Acid + Niacinamide”
- Paula’s Choice “CLEAR Ultra-Light Daily Hydrating Face Sunscreen SPF 30+”
Face Glow
- Kosas “Glow I.V. Vitamin-Infused Skin Illuminating Enhancer”
- Saie “Glowy Super Gel Lightweight Dewy Multipurpose Illuminator”
Primer
Foundation
- Makeup By Mario “SurrealSkin Liquid Foundation”
- Charlotte Tilbury “Beautiful Skin Medium Coverage Liquid Foundation with Hyaluronic Acid”
Concealer
Bronzer
- Rare Beauty “Warm Wishes Effortless Bronzer Stick”
- Fenty Beauty “Sun Stalk’r Instant Warmth Bronzer”
- NARS “Laguna Talc-Free Bronzer Powder”
Blush
- Charlotte Tilbury “Beauty Highlighter Wand” – Pinkgasm Sunset
- Patrick Ta “Monochrome Moment Velvet Blush”
- NARS “Blush” – Dolce Vita
Eyeshow
- Makeup By Mario “Ethereal Eyes Eyeshadow Palette”
- Bronzer + Makeup By Mario “Master Crystal Reflector: Bronzite – shimmering cocoa brown”
- Tarte “Tartelette In Bloom Clay Eyeshadow Palette”
Eyeliner
- Brown Eyeshadow from Eyeshadow Palette
- Rare Beauty “Perfect Strokes Matte Liquid Liner”
- Makeup By Mario “Master Pigment Pro Eyeliner Pencil”
Mascara
- Lancome “Monsieur Big Mascara Duo Set”
- Lancome “Hypnose Drama Instant Full Body Volume Mascara”
- NARS “Climax Mascara”
- Glossier’s Lash Slick Lift and Lengthening Mascara
Highlighter
- Rare Beauty “Positive Light Liquid Luminzer Highlight”
- Charlotte Tilbury “Beauty Highlighter Wand”
- Fenty Beauty’s Diamond Bomb All-Over Diamond Veil.
Setting Powder
- ONE/SIZE by Patrick Starrr “Ultimate Blurring Setting Powder”
Lip
- Rare Beauty “Soft Pinch Tinted Lip Oil: Wonder
- Fenty Beauty “Slip Shine Sheer Shiny Lipstick”
- Charlotte Tilbury “Mini Pillow Talk Lipstick & Liner Set”
- Fenty Beauty “Gloss Bomb Universal Lip Luminizer”
- Gisou “Honey Infused Hydrating Lip Oil”
- Laneige “Lip Glowy Balm”
Setting Spray
- Rare Beauty’s Always An Optimist 4-in-1 Prime & Set Mist
I hope you had as much fun reading my list as much as I enjoyed writing it.
When you start exploring Sephora or building your dream makeup collection, I would love it if you referenced my list and found something that’ll bring you lots of joy.
By the way, you need a night out to show off your new makeup, don’t you?
Click here to read my next blog post 12 Unique Date Night Ideas In Denver to plan your next date night.
Love,
Anastasiya